-
Tri Clamp Compatible Fittings
- Tri Clamp Compatible X NPT Adapters
- Tri Clamp Compatible X Hose Barb Adapters
- Tri Clamp Compatible X Cam & Groove Adapters
- Tri Clamp Compatible X Quick Disconnect Adapters
- Tri Clamp Compatible X Beer Thread Adapters
- Tri Clamp Compatible X Garden Hose Thread adapters
- Tri Clamp Compatible X Corny Post Thread Adapter
- Tri Clamp Compatible X Compression Adapters
- Tri Clamp Compatible X Flare Adapters
- Tri Clamp Compatible X BSP Adapters
- Tri Clamp Compatible Clamps
- Tri Clamp Compatible Gaskets
- Tri Clamp Compatible Valves
- Tri Clamp Compatible Ferrules
- Tri Clamp Compatible Caps
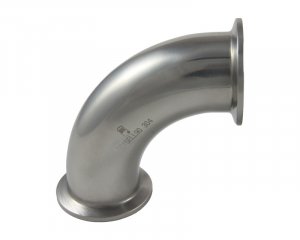
- Tri Clamp Compatible Elbows
- Tri Clamp Compatible Tees
- Tri Clamp Compatible Wyes
- Tri Clamp Compatible Crosses
- Tri Clamp Compatible Sight Glasses
- Tri Camp Compatible Concentric Reducers
- Tri Clamp Compatible Eccentric Reducers
- Tri Clamp Compatible Cap-Style Reducers
- Tri Clamp Compatible Spools
- Tri Clamp Compatible Check Valves
- Tri Clamp Compatible PRV Tank Breathers
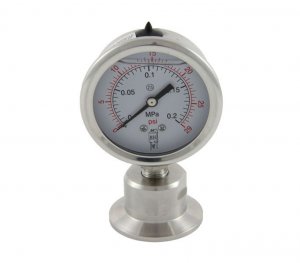
- Tri Clamp Compatible Pressure Gauges
-
Shop By Size
- 1/2"-3/4" Tri Clamp Compatible Fittings
- 1"/1.5" Tri Clamp Compatible Fittings
- 2" Tri Clamp Compatible Fittings
- 2.5" Tri Clamp Compatible Fittings
- 3" Tri Clamp Compatible Fittings
- 4" Tri Clover Compatible Fittings
- 6" Tri Clover Compatible Fittings
- 8" Tri Clover Compatible Fittings
- 10" Tri Clover Compatible Fittings
- 12" Tri Clover Compatible Fittings
- Brewery Controllers
- Brew Stands & Systems
- Brewing Kettles & Hop Filters
- Burners & Accessories
- Cam & Groove Fittings
- Carbonation Stones
- Conicals & Accessories
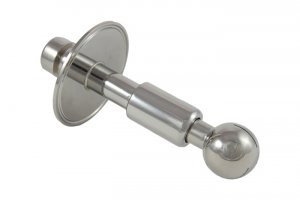
- CIP Spray Balls
- Custom Welding
- Fermentor Kits
-
Gaskets
- 1/2" & 3/4" Tri Clamp Compatible Gaskets
- 1"/1.5" Tri Clamp Compatible Gaskets
- 2" Tri Clamp Compatible Gaskets
- 2.5" Tri Clamp Compatible Gaskets
- 3" Tri Clamp Compatible Gaskets
- 4" Tri Clamp Compatible Gaskets
- 6" Tri Clamp Compatible Gaskets
- 8" Tri Clamp Compatible Gaskets
- 10" Tri Clamp Compatible Gaskets
- 12" Tri Clamp Compatible Gaskets
- Kegging Equipment/Accessories
- Modular Return System
- O-Rings
- Pumps
- Quick Disconnect Fittings
- RIMS Tubes & Electric Brewing
- Thermowells
- Stainless Tubing
- Threaded Fittings
- Temperature Probe Components
- Temperature Sensors
- Wort Strainers
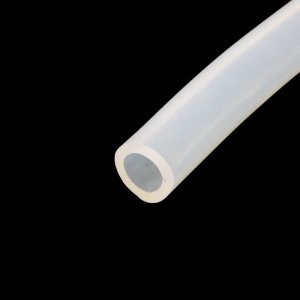
- Tubing/Hose
- Weldless Fittings
- Merch
- Clearance
- Anvil Brewing
- Blichmann Engineering
- Five Star Chemicals
- Penguin Chillers
- Tapcooler Bottle Filler & Accessories
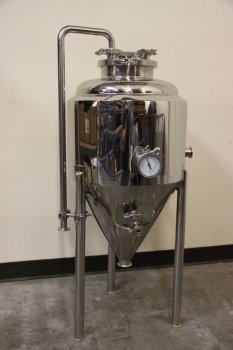
8 Gallon Stainless Steel Glycol Jacketed Conical Fermentor
CON8G-FJ
8 Gallon Stainless Steel Glycol Jacketed Conical Fermentor with Tri Clover Compatible Fittings
Free shipping to all addresses in the lower 48 states!
Our conicals are heavy duty and are shipped via freight to ensure a proper delivery and so no damage occurs during shipping. Please include your phone number at checkout for the freight company to schedule a drop-off.
Click here to read Hazy and Hoppy's review!
After years in development, we feel we have the best small batch size stainless steel conical fermentor on the market. This model is an 8 gallon volume which has plenty of headspace for batches to 6.5 gallons. All of our fermentors are fully welded and polished internally and externally. This version has a glycol jacket and is fully insulated.
The Features That Make Our Fermentors Unique
- Our lid design is a simple and easy to use Tri Clover compatible cap. No lid with a proprietary gasket to deal with, Tri Clover Compatible gaskets are readily available and affordable enough to keep extras on hand. Our 8 gallon model has a 12" lid for easy cleaning. The lid features a 3" Tri Clover Compatible access port for dry hopping or fining and can mount our 3" Tri Clover Compatible CIP Spray Ball. There are three addtional 1.5" ports for the included thermowell and 3/4" blow-off nipple.
- Triple Sealed rotating racking arm. All of the higher end conical fermentors on the market have a rotating racking arm, but most are dependent on just the TC gasket to seal it. When you loosen the clamp to rotate the arm, you're faced with a tricky balance of loosening it enough to rotate without it leaking. We've solved that issue by adding 2 additional o-rings ahead of the Tri Clover compatible clamp attachment, eliminating the leaking issue and isolating that joint from your wort. The o-rings are captured on the arm itself so they are easily removed for cleaning and sanitizing. The ferrule on the body of the fermentor is a standard 1.5" ferrule with no special machining.
Standard Items Included with our 8 Gallon Stainless Steel Conical Fermentor
- 1.5" Tri Clover Compatible Butterfly valve for the bottom dump, including a 1.5" sanitary 90 degree elbow and 1.5" Tri Clover Compatible X 1.5" hose barb adapter
- 1" Tri Clover Compatible Butterfly valve for the rotating racking arm, including a 1/2" hose barb adapter
- 1.5" Tri Clover Compatible X 16" sanitary thermowell.
- All of the required clamps and gaskets to be able to use your fermentor when you get it.
Dimensions
- Overall height including 90* blow-off barb adapter: 40"
- Cylinder Diameter: 12"
- Cylinder Height of Straight Wall: 13 3/4"
- Cone Height: 9.14"
- Distance from Bottom Ferrule to Floor: 9.44"
- 1/4" FNPT Coolant Inlet and Outlet
Additional Features
- 1.5" diameter legs with 1.5" Tri Clover compatible flanges for feet.
- Heavy Duty 2mm thick walls.
Fermenter vs. Fermentor; what's the difference?
For years now, we have seen both terms used interchangeably on web sites and forums. In order to be technically accurate, we did a little research to find out the difference between a fermentor and a fermenter. It turns out that a fermenter is an organism that causes or performs fermentation. A fermentor is the container or apparatus in which fermentation occurs. So your new fermenter is actually a fermentor and yeast is the fermenter! Does that make your wort the fermentee? I think this requires some more research.
Does not include a glycol chiller or cooling source
Please note that if you do not select the option for the $75 lift gate charge at the time you place your order and require a lift gate, the trucking company will add COD charges at the time of delivery that can be several hundred dollars! THIS IS BEYOND OUR CONTROL AND WE CANNOT DO ANYTHING TO HELP YOU ONCE THE SHIPMENT LEAVES OUR WAREHOUSE! Please select the $75 option if you need a lift gate.
If delivering to a residential address, the freight company will call ahead to schedule a drop-off time. The freight company may not call ahead to commercial addresses so if you have a specific time that is more convenient please leave a comment or you may be liable for a holding charge from the freight company if they have to store it.
Customer reviews
-
Devin FAug 18, 2021, 15:01This is a long review, but it is an expensive investment in brewing so I took my time.
After mashing, fermentation is the most critical process to make beer with a consistent quality. One of the biggest upgrades I made to the quality of the beer I produce was with a stainless steel brew bucket. Since it was a conical and had a dip tube I was able to rack beer that was more clear than when using carboys, and I could avoid the bottling bucket completely. Once I started kegging I wanted to do pressurized transfers. However with the huge surface area of a bucket lid and only four spring clamps, I was lucky to get 0.5 PSI before blowing out the seal. During this time I also converted my kettle to tri clamp and replaced my ball valves with butterfly valves. Looking at professional systems, a lot of brewers had switched to Unitanks, so that then became the goal for my fermentation process.
Initially I put together a spreadsheet that included the premier homebrewer equipment manufacturers, including Blichmann, Ss Brewtech, Stout, and Spike. Later I added Brewers Hardware onto that list. Other than wanting a conical unitank, my criteria were that I wanted the ability to heat and cool it, as well as having a full size dump valve, TC diptube, and as many spare TC flanges as possible. The Spike and Ss Brewtech unitanks compared well together if the Spike was outfitted completely. However when I looked at the Brewers Hardware jacketed conical, I knew that is what I wanted.
The jacketed conical is heavy, and expensive. I believe I ended up paying $500 over the price of the non-jacketed conical, and it weighs in at about 85lbs undressed and dry. It is tall on its legs, and when moving it over uneven concrete in my garage (with casters) it would get quite tippy. I would not have it in a place where small children can get to it. Comparing it to the aforementioned brands, it is more expensive than fully-dressed units, however they were not offering jacketed conicals at this size. I do not know if this unit can be considered a unitank since at the time it could not be pressurized to serving pressures (although since then they released a high-pressure clamp).
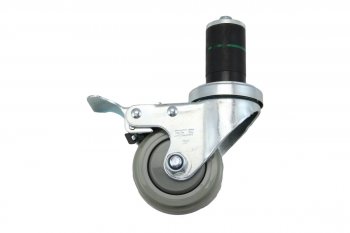
Delivery was painless. I opted for the lift-gate charge since I do not have a dock to unload at. It came fairly quickly, within two weeks, and was delivered crated up. The stickers on the crate directed me to inspect the unit, but since it was crated all I did was look for shipping damage. Anything inside would have been manufacturing or packaging so there would be no point in refusing it. Uncrating it took about half an hour due to the many and long staples, but everything was packaged well with expanded foam and polyvinyl shipping wrap. There were no blemishes or fingerprints, burrs or anything that could be seen as a defect. All the welds were clean and the entire unit was polished in and out. I ordered casters, the blowoff tube, a 30 PSI gauge and a vacuum arrester/PRV which all came bundled up in the same shipment. Oddly, the legs were filled with foam, and to install the casters I had to cut the foam out with a knife. The legs are standard TC flanges. The lid is seriously heavy duty. It is a solid piece of stainless steel with three 1.5" and one 3" flanges which accommodate almost everything. I did buy a T adaptor for it as well in case I decided to put gas on it with the pressure valve installed.
As far as function goes, this is an extremely easy conical to use. The diptube is probably one of the more interesting designs. On my brew bucket I had to make sure that when I installed the diptube into the valve assembly I oriented it so that I could tell where the diptube was pointed as when racking it needs to be able to move deeper into the cone. On this unit is a single piece, although there is no valve integrated on it. The tube is mated to a piece that is slightly smaller than the TC flange, and has two grooves and o-rings for sealing purposes. It also ships with a hard-plastic TC seal that enables the clamp to be loosened and the entire unit rotated without causing a leak or loss of pressure. Back to orientation, the dip tube assembly has an external arm that shows the position of the tube, which of course works as a lever to rotate the tube. I found that it is good to use a food safe grease to lube the o-rings as running them in dry causes them to deform. This was also the case with the brew bucket.
The jacket function is very straightforward. I live in a climate where we are fairly temperate, but we live quite a bit in the ~50 - 70 F range for the majority of the year. This is also in an unheated garage, so there are times when I either need to cool or heat the fermentor. I ended up getting a Colman cooler and a heat stick for heating purposes, and a used Ss FTSs cooler for cooling. I bought some inexpensive hose barbs that thread into the fermentor and stubbed off two polyvinyl hoses and attached them to a quick disconnect. I have quick disconnects on the heating system and the cooling system so I can quickly change them and switch from heating to cooling and vice versa.
Cleaning is a dream. It is as easy to clean by hand as my brew bucket. I bought a food-grade 1.5" discharge hose and used the supplied TC/hose barb to attach it to the dump valve where I then just hose it all out and hit it with a fiber scouring pad. Total time to clean is probably about 10 minutes. CIP is also an option, but for a fermentor this size I don't think it is necessary.
I'm very happy with this purchase, and recommend it if it suits the purpose intended.
-
Thomas GideonJan 9, 2021, 06:20If you are curious about the freight option, especially for a non-commercial purchase, I found it to be relatively smooth. My lead time was about six weeks, which seems appropriate. The carrier for mine was FedEx and they called about 4 business days ahead of delivery. The driver was supper helpful, using the hand truck to bring the crate to my back door which is a half flight closer to my home brewery. Make sure you have a decent pry bar. The packing was excellent but took some time to open up. The staples in particular were long and there were a lot of them. The downside would be if you receive a fermentor with a dent or have other cause to return, you'd probably also have to do a bit of work to re-package. Also, if you can, ask the driver to wait until you've unboxed and inspected your fermentor. The crate is labeled, asking you to inspect before inspecting. I did so after and was super lucky I didn't encounter any problems.
Other than the extra effort to open the wooden crate, the packaging was great, very secure. Once removed from the crate and the extra fittings and lid were removed, we were able to move the fermentor easily with only two people. I could also lift it myself to move it short distances or two and adjust it once in place.
The interior finish on mine was excellent. On the advice of a pro brewer friend of mine, I went over it with a rare earth magnet. No iron filings which isn't surprising since the interior seems to have been polished very thoroughly. There was what appears to be some dried machine oil that had settled into the interior of the cone. Entirely expected and once I have the last few bits to complete my CIP rig, should be easy to clean out.
The lid is substantial, I wasn't expecting that, so be warned. I take care when removing or reattaching mine. Dropping it is more likely to damage anything it hits rather than the lid. I attached all of the accessories I ordered to test fit. Everything went together exactly as expected. I am thrilled at the build quality and quality of materials. The fermentor and several of the accessories even have some subtle BH logos on them, I thought that was a nice touch.
I did notice some dimpling in the interior and this is expected. I fortunately have seen enough full sized commercial fermentors to understand how the double wall construction works. The dimples are points where the two jackets are secured and I think unavoidable. Nothing deep enough to cause issues with cleaning and definitely doesn't affect the polish of the interior surface. I wanted to call this out especially for home brewers considering this item since they may not realize this is part of how the fermentor is constructed and unless they receive one with actual scratches or dents, should not be an issue at all.
For initial set up and regular cleaning, you will need a pump capable of producing more pressure than a home brewer impeller pump can achieve. I bought a Drummond 1/3 HP 4000 GPH with a float switch. I installed a weldless fitting in a plastic bucket and use that as the reservoir for a CIP loop. The only other gotcha I ran into is making sure that your hose or piping from the dump valve back to the bucket is 3/4 or larger ID. Anything less than that will not keep up with the flow through the spray ball. I ran my rig for 20 minutes with 1oz per gallon of PBW, rinsed out with water, then ran another cycle with Five Star's Beer Stone Remover at 1oz per gallon to help ensure passivation.
I recommend a couple of 45 degree elbows and running your CIP loop through the blow off arm. That will ensure, especially before casting into your vessel, that the blow off arm is also cleaned and sanitized.
I have brewed one batch into my fermentor and everything went incredibly smoothly. Transfer was a breeze. My existing glycol chiller, with a 3 gallon reservoir and 1/3 HP submersible pumps, worked just fine with the jacket on this vessel. My plate chiller got the wort down to about 90 degrees and the glycol jacket quickly and easily got the wort the rest of the way to pitching temp.
All the seals were good, including the racking port. Blow off arm worked a treat with a bit of tubing and a tub of water. I added a gas post ball lock fitting for pressure transfers, only thing I haven't tried. I am optimistic that will work well, given my experiences setting up and brewing the first batch in.


