-
Tri Clamp Compatible Fittings
- Tri Clamp Compatible X NPT Adapters
- Tri Clamp Compatible X Hose Barb Adapters
- Tri Clamp Compatible X Cam & Groove Adapters
- Tri Clamp Compatible X Quick Disconnect Adapters
- Tri Clamp Compatible X Beer Thread Adapters
- Tri Clamp Compatible X Garden Hose Thread adapters
- Tri Clamp Compatible X Corny Post Thread Adapter
- Tri Clamp Compatible X Compression Adapters
- Tri Clamp Compatible X Flare Adapters
- Tri Clamp Compatible X BSP Adapters
- Tri Clamp Compatible Clamps
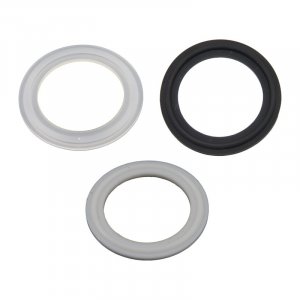
- Tri Clamp Compatible Gaskets
- Tri Clamp Compatible Valves
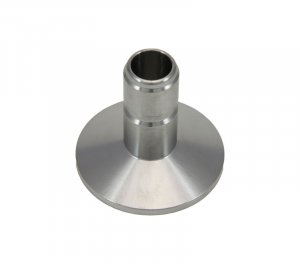
- Tri Clamp Compatible Ferrules
- Tri Clamp Compatible Caps
- Tri Clamp Compatible Elbows
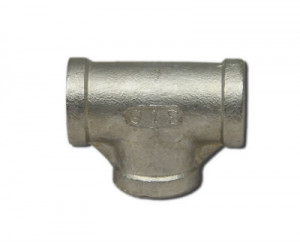
- Tri Clamp Compatible Tees
- Tri Clamp Compatible Wyes
- Tri Clamp Compatible Crosses
- Tri Clamp Compatible Sight Glasses
- Tri Camp Compatible Concentric Reducers
- Tri Clamp Compatible Eccentric Reducers
- Tri Clamp Compatible Cap-Style Reducers
- Tri Clamp Compatible Spools
- Tri Clamp Compatible Check Valves
- Tri Clamp Compatible PRV Tank Breathers
- Tri Clamp Compatible Pressure Gauges
-
Shop By Size
- 1/2"-3/4" Tri Clamp Compatible Fittings
- 1"/1.5" Tri Clamp Compatible Fittings
- 2" Tri Clamp Compatible Fittings
- 2.5" Tri Clamp Compatible Fittings
- 3" Tri Clamp Compatible Fittings
- 4" Tri Clover Compatible Fittings
- 6" Tri Clover Compatible Fittings
- 8" Tri Clover Compatible Fittings
- 10" Tri Clover Compatible Fittings
- 12" Tri Clover Compatible Fittings
- Brewery Controllers
- Brew Stands & Systems
- Brewing Kettles & Hop Filters
- Burners & Accessories
- Cam & Groove Fittings
- Carbonation Stones
- Conicals & Accessories
- CIP Spray Balls
- Custom Welding
- Fermentor Kits
-
Gaskets
- 1/2" & 3/4" Tri Clamp Compatible Gaskets
- 1"/1.5" Tri Clamp Compatible Gaskets
- 2" Tri Clamp Compatible Gaskets
- 2.5" Tri Clamp Compatible Gaskets
- 3" Tri Clamp Compatible Gaskets
- 4" Tri Clamp Compatible Gaskets
- 6" Tri Clamp Compatible Gaskets
- 8" Tri Clamp Compatible Gaskets
- 10" Tri Clamp Compatible Gaskets
- 12" Tri Clamp Compatible Gaskets
- Kegging Equipment/Accessories
- Modular Return System
- O-Rings
- Pumps
- Quick Disconnect Fittings
- RIMS Tubes & Electric Brewing
- Thermowells
- Stainless Tubing
- Threaded Fittings
- Temperature Probe Components
- Temperature Sensors
- Wort Strainers
- Tubing/Hose
- Weldless Fittings
- Merch
- Clearance
- Anvil Brewing
- Blichmann Engineering
- Five Star Chemicals
- Penguin Chillers
- Tapcooler Bottle Filler & Accessories


Blichmann AutoSparge
BLICH-AutoSparge
Blichmann AutoSparge
From Blichmann's Website:
Have you longed for a sparging system with a "set-it-and-forget-it" design? The elegantly simple construction of Blichmann Engineering's AutoSparge™ automatically sets the hot liquor flow rate and liquid level in your mash tun. As you change the sparge rate into your boil kettle, the AutoSparge™ automatically responds by increasing or decreasing hot liquor flow to compensate and keeps a constant level in your mash tun.
Newly redesigned - 100% stainless steel, improved o-ring mounting and 1/2" NPT thread.
The AutoSparge™ level and flow control system is an awesome accessory for RIMS systems, and it also works great with gravity systems or with pumps! Wort gently rotates on top of the grain bed to reduce channeling and oxygen pick-up, and to increase extraction efficiency. With a constant hot liquor level over your grain bed, complicated rotating sparge arms are unnecessary!
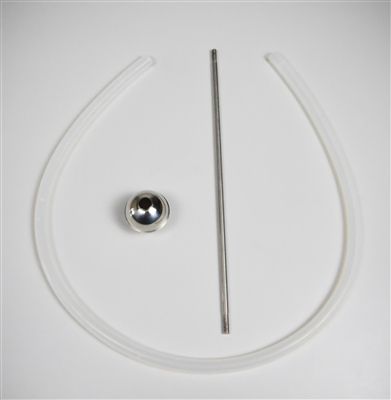
- Stainless steel float ball, float arm, and valve body!
- Includes 18" silicone hose and stainless steel hose float ball.
- Fits any kettle larger than 12" in diameter, including converted kegs.
- Comes equipped with 6" float arm. 9" and 12" float arms available separately for increasing range of motion. Min pot diameter for longer float arms is 15" and 18" respectively.
From Blichmann's Website:
The AutoSparge™ can be easily installed into any kettle or cooler larger than 12" in diameter.

To install yourself, you'll need to punch / drill a 13/16" hole in your kettle or cooler. A 7/8" hole will work, but it's a little on the big side. We recommend using a step drill or a Greenlee knock-out punch. A great source for these is McMaster-Carr . The step drill is part number 8841A24 (89315A42 for TiN coating) or a punch 3449A999 - requires a 3/8" pilot hole. This particular punch (Greenlee model 730BB) is special-order with a three-day lead time. Slug-Buster types are available in their catalog but do not work well in this application. When drilling stainless steel, a moderate to slow speed is best to avoid overheating the tool. While hole saws will also work, they are difficult to use in stainless sheet metal.
Installing into a Cooler
The threaded portion of the AutoSparge™ is not long enough to fit through a 1-2" deep cooler wall, so you will need to use a 2" hole saw for clearance for your hose connection and a smaller hole for mounting the AutoSparge™. To do this, drill a 1/4" pilot hole all the way through the cooler at the desired location. Then, slowly and carefully saw through the outside layer of the cooler. Be careful that you do not accidentally drill all the way through it. Remove the outer cut-out and foam insulation inside the hole. Then, drill the 13/16" mounting hole through the inside wall of the cooler with a step drill. Here are a few shots of the installation in a 10 gallon Rubbermaid cooler: